Origami Bookmarks Easy Simple Step by Step folding instructions

In this article you’ll find Corner Origami Folding Instructions with free print outs , free designs, corner bookmark cheat method and lots of other bookmark ideas and designs. : 1. Corner Origami Bookmarks DIY Folding Instructions – How to Make a Bookmark Origami, 2. Cheat Method Origami Corner Bookmarks . Origami, the Japanese art of paper folding, offers a delightful way to combine creativity and functionality. One of the simplest and most charming applications of origami is the creation of corner bookmarks. These playful, decorative pieces not only enhance your reading experience but also serve as a wonderful introduction to the world of origami. Bookmarks are more than just tools for marking pages; they are expressions of creativity and personality. Crafting your own bookmarks can add a personal touch to your reading experience while providing a delightful way to showcase your style.
1. Corner Origami Bookmarks DIY Folding Instructions – OR How to Make a Bookmark Origami
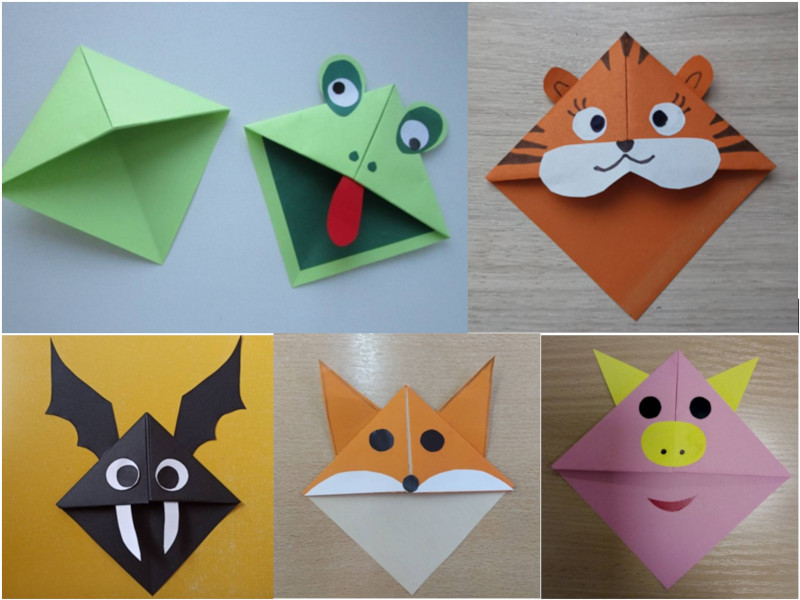
Origami is believed to have originated in China around the 1st century AD, spreading to Japan by the 6th century. Initially, paper was a luxury item, and the art form was primarily practiced by the elite and during ceremonial occasions. Over the years, origami evolved from a ceremonial art to a popular hobby. In Japan, origami took on a more formal structure with the development of distinct styles, such as “sori” and “tsutsumi,” often used in traditional ceremonies like weddings and festivals. By the 19th century, origami began to gain popularity outside of Japan, leading to a global appreciation of the craft.
Then, over the centuries origami evolved into a sophisticated art form with various styles and techniques. Today, origami is practiced worldwide, with enthusiasts exploring innovative designs, from intricate sculptures to functional items like bookmarks.
Supplies Needed for Origami Bookmarks
- A square piece of paper (origami paper works best, but any paper will do)
- Scissors (to cut your paper into a square
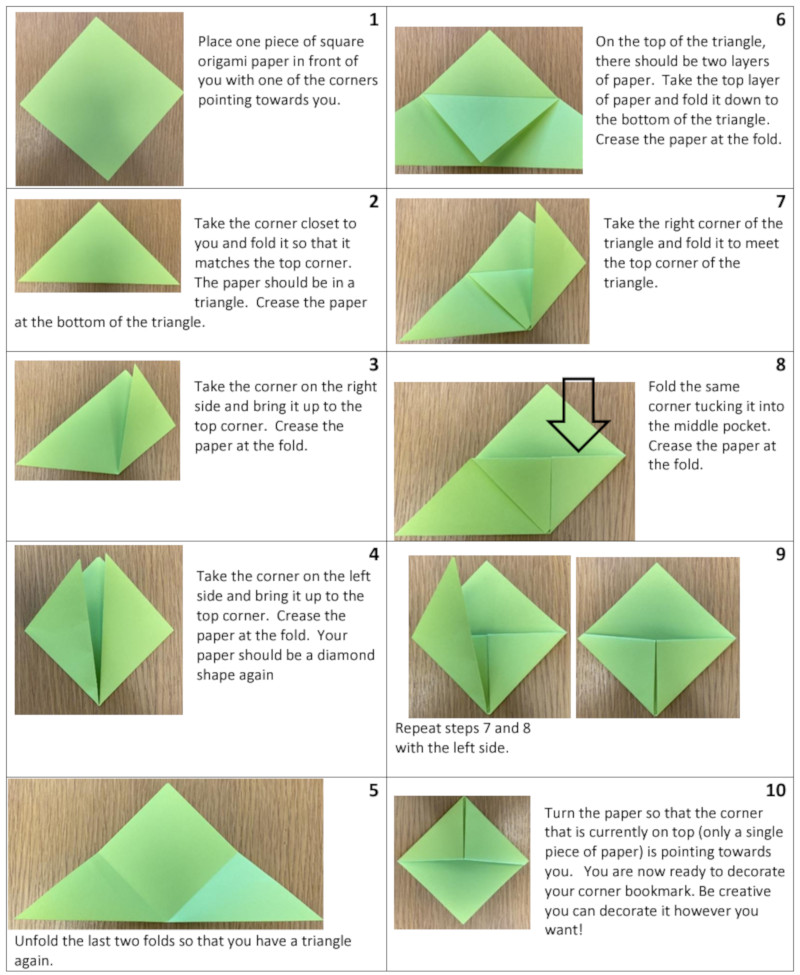
Folding Instructions – Simple Origami Bookmarks
- Start with a Square: If your paper isn’t already square, cut it to size. A typical size is 15cm x 15cm (6 inches x 6 inches).
- Fold Diagonally: Fold the square diagonally in half to form a triangle. Crease well and then unfold.
- Fold Corners: Take the two top corners of the triangle and fold them down to meet the bottom point of the triangle. This will create a smaller triangle at the top.
- Create the Pocket: Fold the triangle in half again, bringing the top point down to meet the bottom edge. This will create a pocket for your bookmark.
- Decorate: If desired, you can draw or decorate your bookmark with patterns or stickers. Personalizing your bookmark makes it even more special.
- Use Your Bookmark: Slip the corner of your bookmark over the corner of the page you wish to mark, and enjoy your reading!
Variations & Origami DYI Ideas:
Once you’ve mastered the basic corner bookmark, you can experiment with different designs and themes. Here are a few ideas:
- Animal Faces: Create bookmarks in the shape of animals, like cats, foxes, or owls, by adding features with colored pencils or markers.
- Seasonal Themes: Make bookmarks that reflect the seasons—flowers for spring, leaves for autumn, or snowflakes for winter.
- Quotes and Messages: Write inspirational quotes on your bookmarks to motivate yourself or friends during reading.
Let’s learn how to fold a bookmark! Origami corner bookmarks are a delightful blend of art and practicality. They invite creativity, provide a functional solution for marking your place in a book, and make for thoughtful gifts. Whether you’re a seasoned origami enthusiast or a beginner looking for a fun craft, creating these bookmarks can be a rewarding and enjoyable experience. So grab some paper, fold away, and add a touch of artistry to your reading routine!
Why Choose Origami Bookmarks?
While traditional bookmarks are often made from cardstock or plastic, origami bookmarks stand out because they are crafted from a single piece of paper, using intricate folds to create unique designs. Origami bookmarks offer several advantages:
- Customization: With a simple piece of paper, you can create a bookmark in any color or pattern, from minimalistic designs to elaborate geometric shapes. You can also tailor them to fit personal preferences, whether it’s for yourself or as a gift.
- Creativity: Origami bookmarks allow for an opportunity to experiment with different folding techniques and designs. The process can be a great creative outlet for both children and adults alike.
- Eco-Friendly: Since origami bookmarks are made from paper, they are a sustainable alternative to mass-produced plastic or laminated bookmarks. Plus, you can use recycled paper or old magazines to give them new life.
- Compact and Lightweight: Origami bookmarks are usually compact and lightweight, making them easy to carry around without adding bulk to your books.
- Cost-Effective: Paper is inexpensive, and origami bookmarks require little to no additional materials. All you need is a square piece of paper and a bit of patience to fold it into shape.
2. Cheat Method for Origami Corner Bookmarks
Corner bookmarks are a clever and functional design that fits snugly over the corner of the page. They are easy to make and can be highly decorative. For smaller kids who can not yet master the art of origami folding you can use the cheat print outs for corner bookmarks.
Materials Needed
- Paper or cardstock: regular white paper
- Scissors
- Ruler
- Glue or double-sided tape
Corner DIY Bookmark Instructions
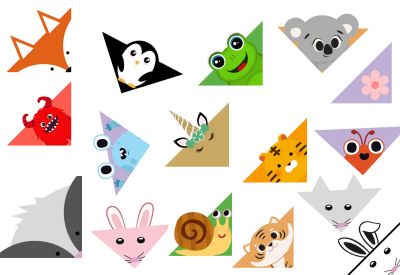
- Select your favorite design and print it : Click on the “Download corner bookmarks free print out designs” and print the design you like (or all of them). Inside the pdf you’ll find designs for animal corner bookmarks – penguin, dog, frog, koala, tiger, mouse, bunny, fox, dog, unicorn badger, monsters, snail, flower, butterfly corner bookmarks.
- Cut The Design: Using your scissors, carefully cut along the lines designated by the template.
- Score the fold lines: For straight fold lines, line your ruler up next to the marked edges on the template to guide you.
- Fold and Glue Fold the the symmetrical model. Fold the third section inward (the small white section) . Apply glue on the small section / on the tab. To help glue dry faster, start by using a minimal amount of glue, just what is necessary, and make sure you are applying it onto a dry surface with no other moisture.
- Use Your Bookmark: Slide your corner bookmark onto the corner of your page, and enjoy your reading without losing your place.
Origami bookmarks combine the beauty of paper folding with the practicality of a reading tool, making them both functional and aesthetically pleasing. Whether you’re new to origami or an experienced folder, creating a unique bookmark can be a fun and rewarding project. Not only do these bookmarks help keep your place in a book, but they also serve as personal expressions of creativity. Plus, they make wonderful handmade gifts for friends, family, or fellow book lovers. So, grab a square piece of paper, and start folding your way to a more personalized reading experience! Nad if you don’t feel up to do so many folds, or you have very small kids, then use our origami cheat print outs: they are easy to fold and glue, super cute and perfect for very little hands!
Scroll down to continue to see more DIY bookmark ideas and designs.
3. DIY Bead Bookmarks Designs – Beaded Bookmarks
Bead bookmarks add a tactile element to your reading experience. They are easy to make and can be customized to fit your personal style.
Materials Needed
- String or cord: Use nylon or cotton cord, depending on your preference.
- Beads: Choose various shapes, sizes, and colors.
- Scissors
- Crimp beads: Optional, for securing the ends.
- Bookmark base: A sturdy piece of wire or a pre-made bookmark base.
Instructions
- Cut Your String: Cut a length of string that is about 10-12 inches long, allowing for the beads and some extra for tying.
- Select Your Beads: Choose a combination of beads that you like. You can use themed colors or different textures to make it visually interesting.
- String the Beads: Start threading the beads onto the string. Leave a bit of space at each end for tying knots or adding crimp beads.
- Secure the Ends: Once you’re happy with your design, tie a secure knot at each end. If using crimp beads, slide them onto the string and flatten them with pliers to hold everything in place.
- Add a Bookmark Base: If you’re using a wire base, fold the end of the string around it and tie a knot to secure it.
- Show Off Your Bookmark: Use your beautiful bead bookmark in your favorite book or give it as a gift!
Tips
- Mix and match different bead types, like wooden beads with glass beads, for a unique look.
- Consider adding charms or pendants for an extra flair.
Products used to create the bookmarks in the images above:
Original price was: $13.99.$7.99Current price is: $7.99.
Original price was: $16.99.$12.99Current price is: $12.99.
Original price was: $11.99.$9.99Current price is: $9.99.
Original price was: $12.00.$9.99Current price is: $9.99.
Why choose beaded bookmarks?
Beaded bookmarks are a unique and visually stunning way to mark your page, combining the beauty of beads with the practicality of a functional object. Here are some reasons why beaded bookmarks are worth considering:
- Aesthetic Appeal: The combination of beads—whether glass, metal, wood, or gemstones—creates an eye-catching and luxurious design. Beaded bookmarks add an extra layer of charm and style to any book, elevating the reading experience.
- Durability: Unlike paper bookmarks that can tear or bend over time, beaded bookmarks are typically made from durable materials such as wire, cord, or leather. They can withstand frequent use without losing their form.
- Personalization: Beaded bookmarks can be customized in countless ways. You can choose beads that reflect a specific color scheme, theme, or even your personal interests, whether that’s a favorite color, a hobby, or a particular gemstone.
- Thoughtful Gift: A beaded bookmark makes a great personalized gift for readers. Whether for a birthday, holiday, or as a thoughtful gesture, a handmade beaded bookmark can show someone you care about their love of reading.
- Easy to Make: With just a few basic materials—beads, wire or cord, and some basic jewelry-making tools—you can create your own beaded bookmark. This makes it a great DIY project for anyone who enjoys crafting.
4. Letter Beads Bookmarks
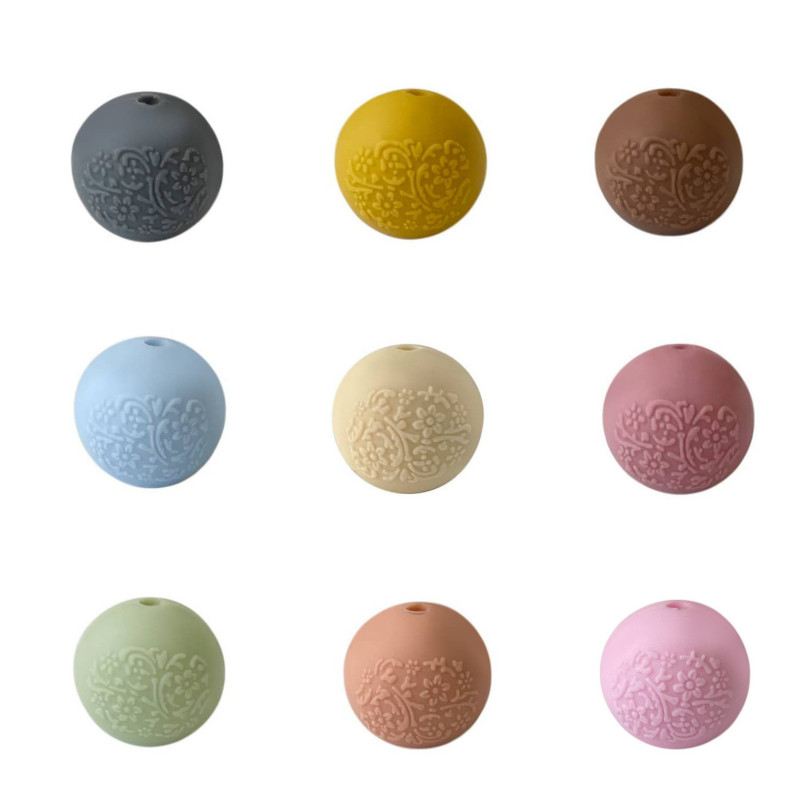
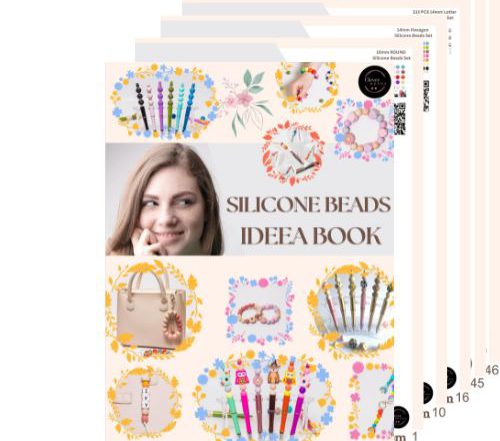
When buying the alphabet letter beads make sure you check the size and buy the other matching beads accordingly. For example if you buy silicone letter beads they usually com in size 12 mm, therefore you should buy round 12 mm silicone beads to match. Please be aware that there are regular silicone letter beads (first image) and vertical hole silicone letter beads (second image).
Creative Ideas for Letter Bead Bookmarks:
Here are some fun and creative ways to design your letter bead bookmark:
- Inspirational Quotes: Choose a few words or a short quote that inspires you. For example, “Keep Going” or “Believe” can add motivation to your reading experience.
- Favorite Book or Author: Spell out the name of your favorite book or author, or create a bookmark for the title of a book you’re currently reading.
- Initials or Names: A simple and elegant design could be your initials or the initials of a loved one. This can make the bookmark a special, personalized gift.
- Color Themes: Experiment with different color schemes to match your favorite colors, the season, or even the colors of a book cover. For instance, choose pastel-colored beads for a soft and calming look, or vibrant hues for a bold statement.
- Symbolic Charms: Add symbols or charms that are meaningful to you. For example, a small star, moon, or butterfly can represent a theme from a book you love, or a key charm could symbolize unlocking new worlds within the pages of a novel.
- Custom Gifts: Create a set of bookmarks with different words or themes for a group of friends, family members, or book club members. Each bookmark can be tailored to reflect their personality or preferences.
Products used to create the bookmarks in the images above:
Original price was: $13.99.$7.99Current price is: $7.99.
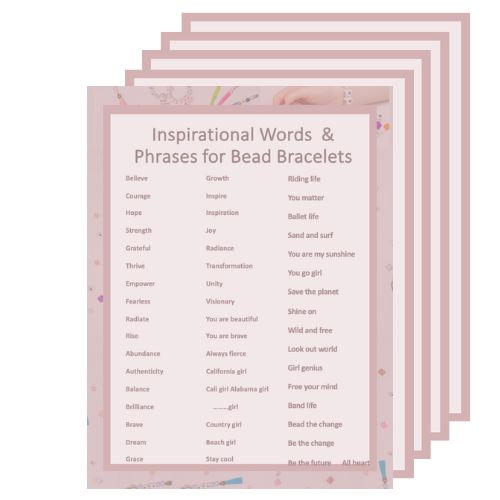
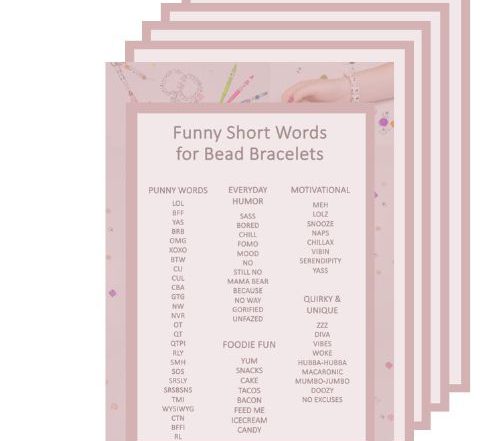
Download Free Inspiration LIsts Words to Put on Bracelets and Beaded Bookmarks:
Here’s a list of inspirational, motivational, cute & funny words to put on bracelets, short good words and sayings for beaded bracelets
Here is a list of 100+ Funny Short Words to Put on Bead Bracelets grouped by categories: 1. Punny Words, 2. Everyday Humor, 3. Foodie Fun, 4. Motivational with A Twist, 5. Quirky and Unique. Jewelry has always been a means of personal expression, and the latest trend in customizing accessories is all about infusing a bit of humor and personality. Bead bracelets, in particular, have become...
5. Other DIY Bookmark Ideas and Designs
5.1 Magnetic Bookmarks
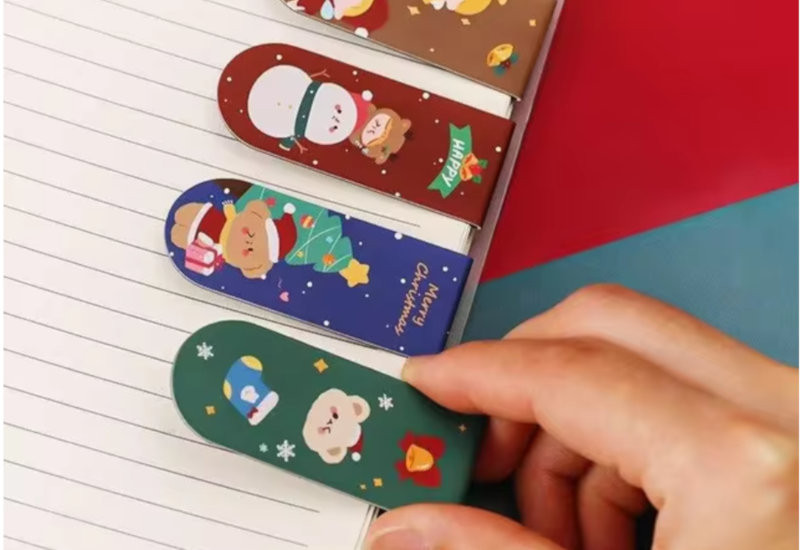
Magnetic bookmarks are a practical and stylish way to keep your place in any book. These small accessories use magnets to securely attach to the edge of a page, ensuring they stay in place without damaging the paper. Unlike traditional paper bookmarks, magnetic bookmarks won’t slip out or get lost easily, making them ideal for readers who frequently flip between pages. They come in various designs, from simple patterns to intricate illustrations, and can add a personal touch to your reading experience. Lightweight and durable, magnetic bookmarks are perfect for those who love to read on the go or need a reliable tool to keep track of where they left off. Here’s how to create your own magnetic bookmarks.
Materials Needed
- Paper or cardstock: Choose a design or color that speaks to you.
- Magnetic strips: Available at craft stores or online.
- Scissors
- Glue: Craft glue or a glue stick.
- Decorative items: Stickers, washi tape, or colored pens.
Instructions DIY Magnetic Bookmark Ideas:
- Cut the Paper: Start by cutting your cardstock into rectangles. A good size is about 2 inches by 4 inches, but you can adjust this based on your preference.
- Design Your Bookmark: Decorate the cut cardstock with stickers, drawings, or washi tape. This is where your creativity shines. You might want to create themed bookmarks for different genres or seasons.
- Attach the Magnetic Strips: Cut the magnetic strips to the size of the bookmark. You will need two pieces for each bookmark—one for the front and one for the back. Peel off the backing and adhere one piece to the bottom of the front side and the other to the back side. Ensure they align perfectly to create the snap effect.
- Finishing Touches: Make sure everything is securely glued. You can also laminate the bookmarks for added durability.
- Enjoy Your Bookmarks: Use your new magnetic bookmarks to keep track of your reading. They also make great gifts for fellow book lovers!
Tips
- Experiment with different shapes, such as animal outlines or geometric designs.
- Use themed colors for different books, like pastels for romance and bold colors for thrillers.
5.2 Paper/ Cardstock Bookmarks
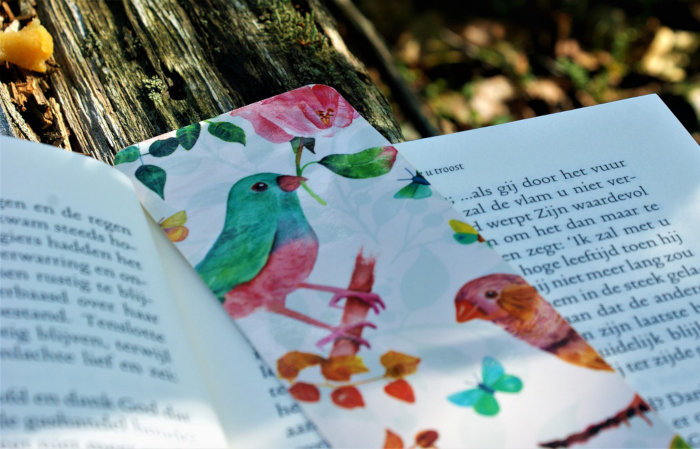
Bookmarks are essential tools for avid readers, but they don’t have to be boring or generic. Making your own paper cardboard bookmarks is a fun and creative way to express your personality while keeping your place in your favorite books. In this section, we’ll explore the benefits of crafting your own bookmarks, the materials you’ll need, and a few simple techniques to create unique designs.
Why Make Your Own Bookmarks?
- Personalization: Store-bought bookmarks often lack the personal touch that homemade ones provide. By creating your own, you can choose colors, themes, and designs that reflect your interests and personality.
- Cost-Effective: Crafting bookmarks from cardboard and paper is an economical choice. Instead of spending money on fancy bookmarks, you can use materials you already have at home.
- Eco-Friendly: Using recycled materials like old cardboard boxes or leftover craft paper is a great way to reduce waste. By repurposing these materials, you can create something beautiful and environmentally friendly.
- Fun Activity: Making bookmarks can be a delightful activity to share with friends or family. It’s an excellent way to unwind and express your creativity, whether you’re a child or an adult.
Paper Easy DIY Bookmark Ideas – Suplies Needed
Creating DIY bookmarks is straightforward and requires minimal supplies:
- Cardboard: You can use old cereal boxes, shipping boxes, or any other type of cardboard.
- Decorative Paper: Scrapbooking paper, wrapping paper, or even old magazines can add a splash of color and design.
- Scissors: For cutting the cardboard and decorative paper.
- Glue or Double-Sided Tape: To attach the decorative paper to the cardboard.
- Markers, Paint, or Stickers: For additional decoration and personalization.
- Ruler and Pencil: To measure and mark your desired bookmark size.
DIY Step-by-Step Instructions
- Cut the Cardboard: Start by cutting the cardboard into your desired bookmark size. A standard size is approximately 2 inches by 6 inches, but you can customize this to your liking.
- Decorate the Cardboard: Choose decorative paper that you like and cut it to the same size as the cardboard. Use glue or double-sided tape to adhere the decorative paper to one side of the cardboard.
- Add Personal Touches: This is where you can get creative! Use markers to draw designs, paint patterns, or apply stickers. You can also write quotes or phrases that inspire you.
- Seal the Bookmark (Optional): For added durability, consider laminating your bookmark or applying a clear sealant. This will help protect it from wear and tear over time.
- Create a Tassel (Optional): If you want to add a fun detail, you can create a tassel using embroidery thread or ribbon. Simply cut a length of thread, tie it together at one end, and attach it to the top of your bookmark.
DIY paper cardboard bookmarks are not only practical but also a wonderful way to express your creativity. Paper & tassel bookmarks were voted the easiest diy bookmark ideas in 2024 by our readers. Whether you’re making them for yourself or as gifts for fellow book lovers, the process is enjoyable and rewarding. They are the easiest items to make from all Diy bookmark ideas. So gather your materials, unleash your imagination, and start crafting bookmarks that will add a personal touch to your reading experience!
5.3 Felt Bookmarks
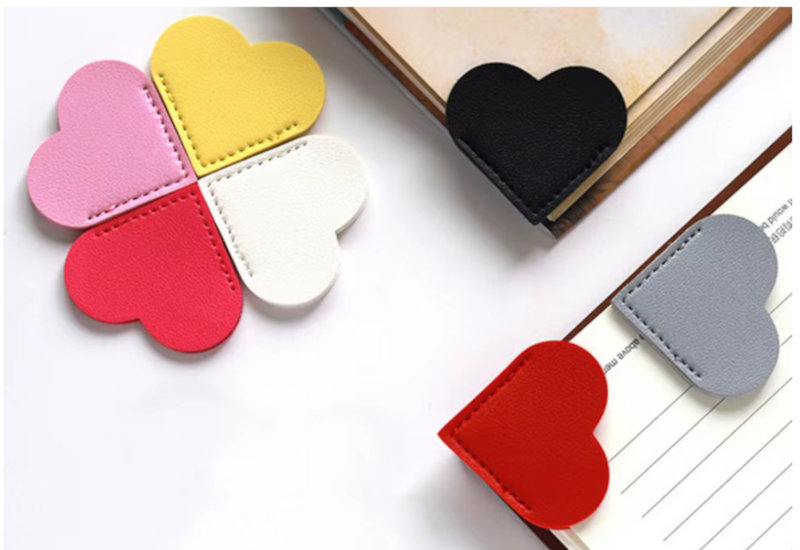
Creating felt bookmarks is a fun and easy craft project that adds a personal touch to your reading experience. Here’s how to get started!
Materials Needed
- Felt Sheets: Choose a variety of colors for a fun design.
- Scissors: For cutting the felt into your desired shapes.
- Fabric Glue or Hot Glue Gun: To secure any embellishments. (or you can sew the corner bookmarks and then you need sewing machine or a needle and thread).
- Ruler: To measure and cut straight lines.
- Pencil or Fabric Marker: For tracing your designs on the felt.
- Embellishments (optional): Such as buttons, beads, or ribbons for decoration.
- Craft Knife (optional): For intricate cuts.
Felt DIY Bookmark Ideas Instructions:
- Choose Your Design: Decide on the shape and style of your bookmark. Popular options include simple rectangles, fun animal shapes, or themed designs.
- Measure and Cut the Felt: Use a ruler to measure the desired length and width of your bookmark. A standard size is about 2 inches wide and 6-8 inches long. Trace the shape onto the felt with a pencil and cut it out with scissors.
- Add Decorations: If you want to add designs, use markers or fabric paint to create patterns on your felt. You can also layer different colors of felt to create unique shapes and images.
- Secure Embellishments: If you’re using buttons, beads, or other decorations, apply fabric glue or use a hot glue gun to attach them to the felt. Let the glue dry completely.
- Finish the Edges (optional): To give your bookmark a polished look, you can sew around the edges with a simple straight stitch or use a zigzag stitch for a decorative touch.
- Let it Dry: If you’ve used glue, allow your bookmark to dry completely before using it.
- Enjoy Your Bookmark: Your handmade felt bookmark is now ready to keep your place in your favorite book!
5.4 Flower Pressed Bookmarks
Pressed flower bookmarks are a beautiful way to capture the essence of nature. They add a touch of elegance and can be cherished for years.
Supplies Needed
- Flowers: Choose small flowers or leaves that can be easily pressed.
- Heavy books or a flower press: For pressing the flowers.
- Clear contact paper or laminating sheets
- Scissors
- Cardstock: For the base of the bookmark.
Instructions
- Press the Flowers: Place your chosen flowers between the pages of a heavy book or in a flower press. Leave them for a few days to dry completely.
- Cut the Bookmark Base: Once the flowers are pressed, cut a piece of cardstock into your desired bookmark shape, typically about 2 inches by 6 inches.
- Arrange the Flowers: Once your flowers are dry, arrange them on the cardstock. Play around with different layouts until you find one you like.
- Seal the Flowers: Use clear contact paper or laminating sheets to cover the flowers and cardstock. This will protect them and make your bookmark durable.
- Trim the Edges: If needed, trim any excess material from the edges to make it neat.
- Admire Your Creation: Enjoy your unique flower pressed bookmark, or gift it to someone special.
Tips
- Use flowers from your garden or local area to personalize your bookmarks.
- Experiment with layering different types of flowers for a textured look.
Scroll down for more DIY origami bookmarks ideas, designs & free print outs.
9. More about Origami Bookmarks
Modern Origami
In the 20th century, origami experienced a renaissance, largely due to the efforts of artists like Akira Yoshizawa, who is credited with introducing notation systems that standardized origami instructions. Today, origami is recognized not only as a form of artistic expression but also as a mathematical discipline and a method for solving complex engineering problems.
The Role of Bookmarks in Reading
Bookmarks have been used for centuries to keep one’s place in a book. They serve a practical purpose, but they can also be a reflection of personality and style. With the rise of digital reading, traditional bookmarks have become a way to personalize the reading experience, reminding readers of the tactile joy of physical books. Origami bookmarks are simple to make and you always have the needed supplies handy (plain paper).
The Cultural Importance of Bookmarks
Bookmarks have cultural significance in many societies. In some cultures, bookmarks are given as gifts, representing the importance of literacy and education. In others, they are used as a form of art, showcasing intricate designs and personal expressions.
Basic Origami Bookmarks & Other Origami Items Techniques
-Understanding the Paper- The choice of paper is crucial in origami. While traditional origami uses washi or origami paper, you can use any type of paper, including old wrapping paper, magazines, or even recycled paper. The key is to select paper that holds a crease well.
-Basic Folds
- Valley Fold: A simple fold where the paper is folded towards you, creating a “V” shape.
- Mountain Fold: The opposite of a valley fold, where the paper is folded away from you.
- Reverse Fold: A fold that changes the direction of a previous fold.
- Squash Fold: A technique used to flatten a portion of the paper.
-Practice Makes Perfect – Start with simple models to build your confidence. The more you practice, the more adept you will become at making intricate designs.
Origami bookmarks make fantastic gifts. Consider creating a set for friends or family, perhaps themed around their favorite books or genres. You can also include a personal note explaining the significance of origami and the effort put into each piece.
10. Download Origami Bookmarks Free Folding Instructions , Print Outs & Designs PDF
8. Download PDF List of Words to Put on Bracelets
Other Articles you might like in addition to List of funny short words to put on bead bracelets : Inspirational Words to put on Beads Bracelets, MOtivational Words to put on Bead Bracelets.
SECTIONS:
Original price was: $13.99.$7.99Current price is: $7.99.
Original price was: $13.99.$7.99Current price is: $7.99.






Pam says:
BettySweet says:
Jamie says: